Appearance
OAuth 2.0
Great for integrations that require access to multiple user accounts or teams | Seamless user experience
OAuth 2.0 is a protocol that allows users to grant third-party applications access to their data and perform actions on their behalf. It is the recommended workflow for any integration that requires access to more than one user account or team. If you are new to REST APIs, the flow can seem complicated. However, once it is in place, generating an access token is straightforward.
This is an overview of how to get access to the Amiqus API using OAuth 2.0.
Register your application
In order to communicate with the Amiqus API using OAuth 2.0 you need an Amiqus account to register your application. If you don't yet have one, contact us to set up a sandbox Amiqus account.
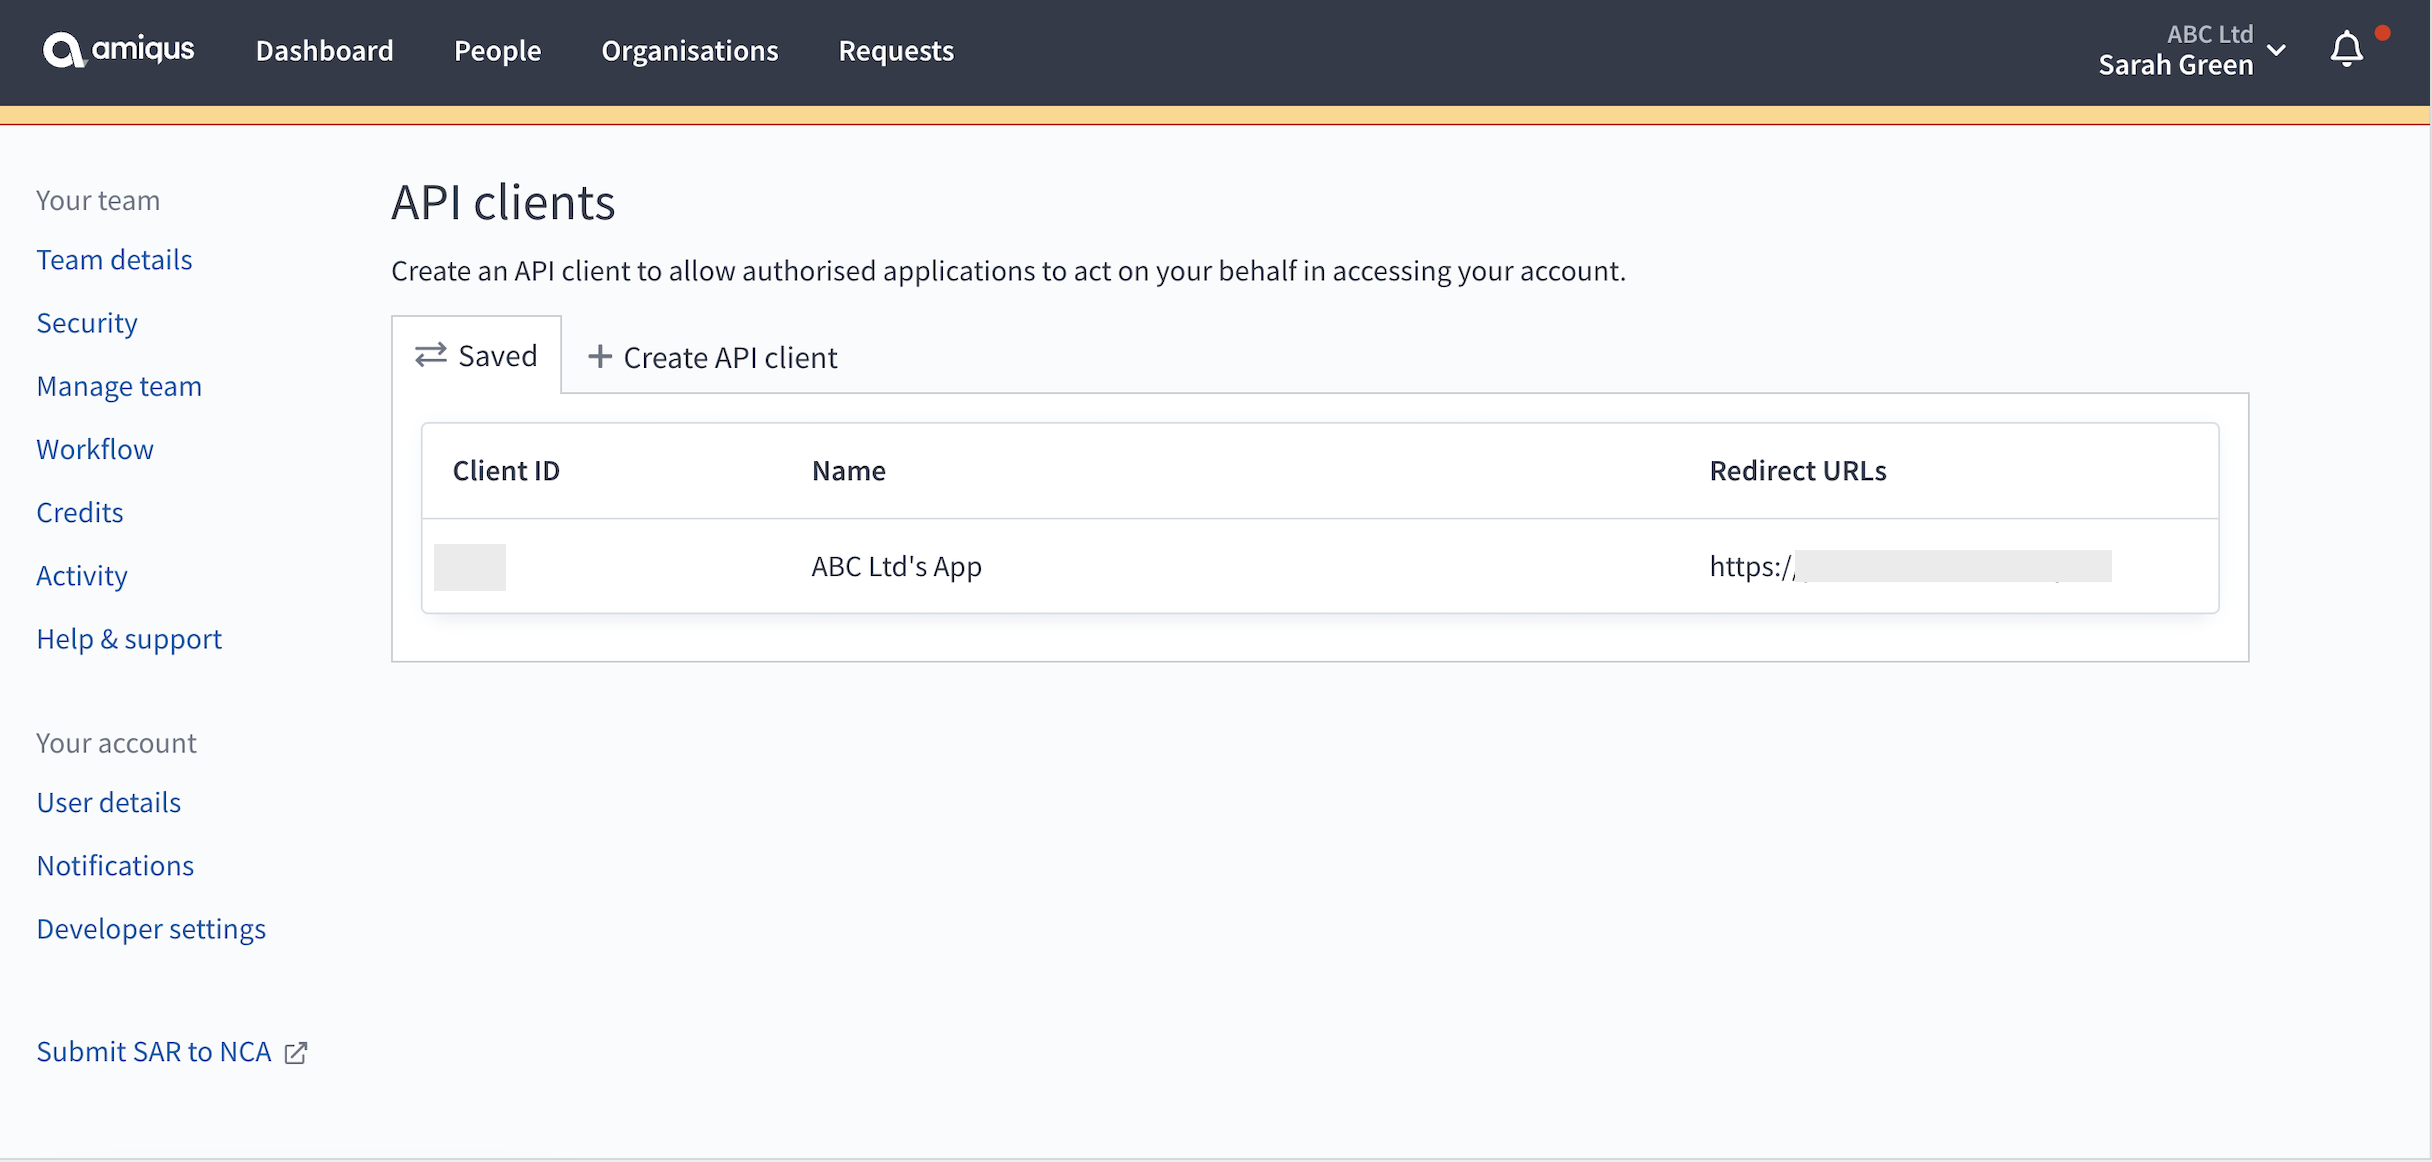
Registering your application can be done via Amiqus Developer Settings dashboard by following these steps:
- Access the Amiqus Developer Settings dashboard via the dropdown menu under your user name
- Click API clients then click Create an API client
- Enter the following information:
- The Name of your application (this will be shown to users on the authorisation page, so it should be easily recognisable)
- The URL(s) of your application where users are redirected after authorisation is complete. You can add or update redirect URLs at any time.
⚠️ Third party urls
It is strongly recommended to avoid using third party urls (e.g. HTTPBin, RequestBin, Postman Echo) for security and data protection purposes.

- You will be redirected to the API clients overview page where you can see your registered API client. Here you will find your Client ID.
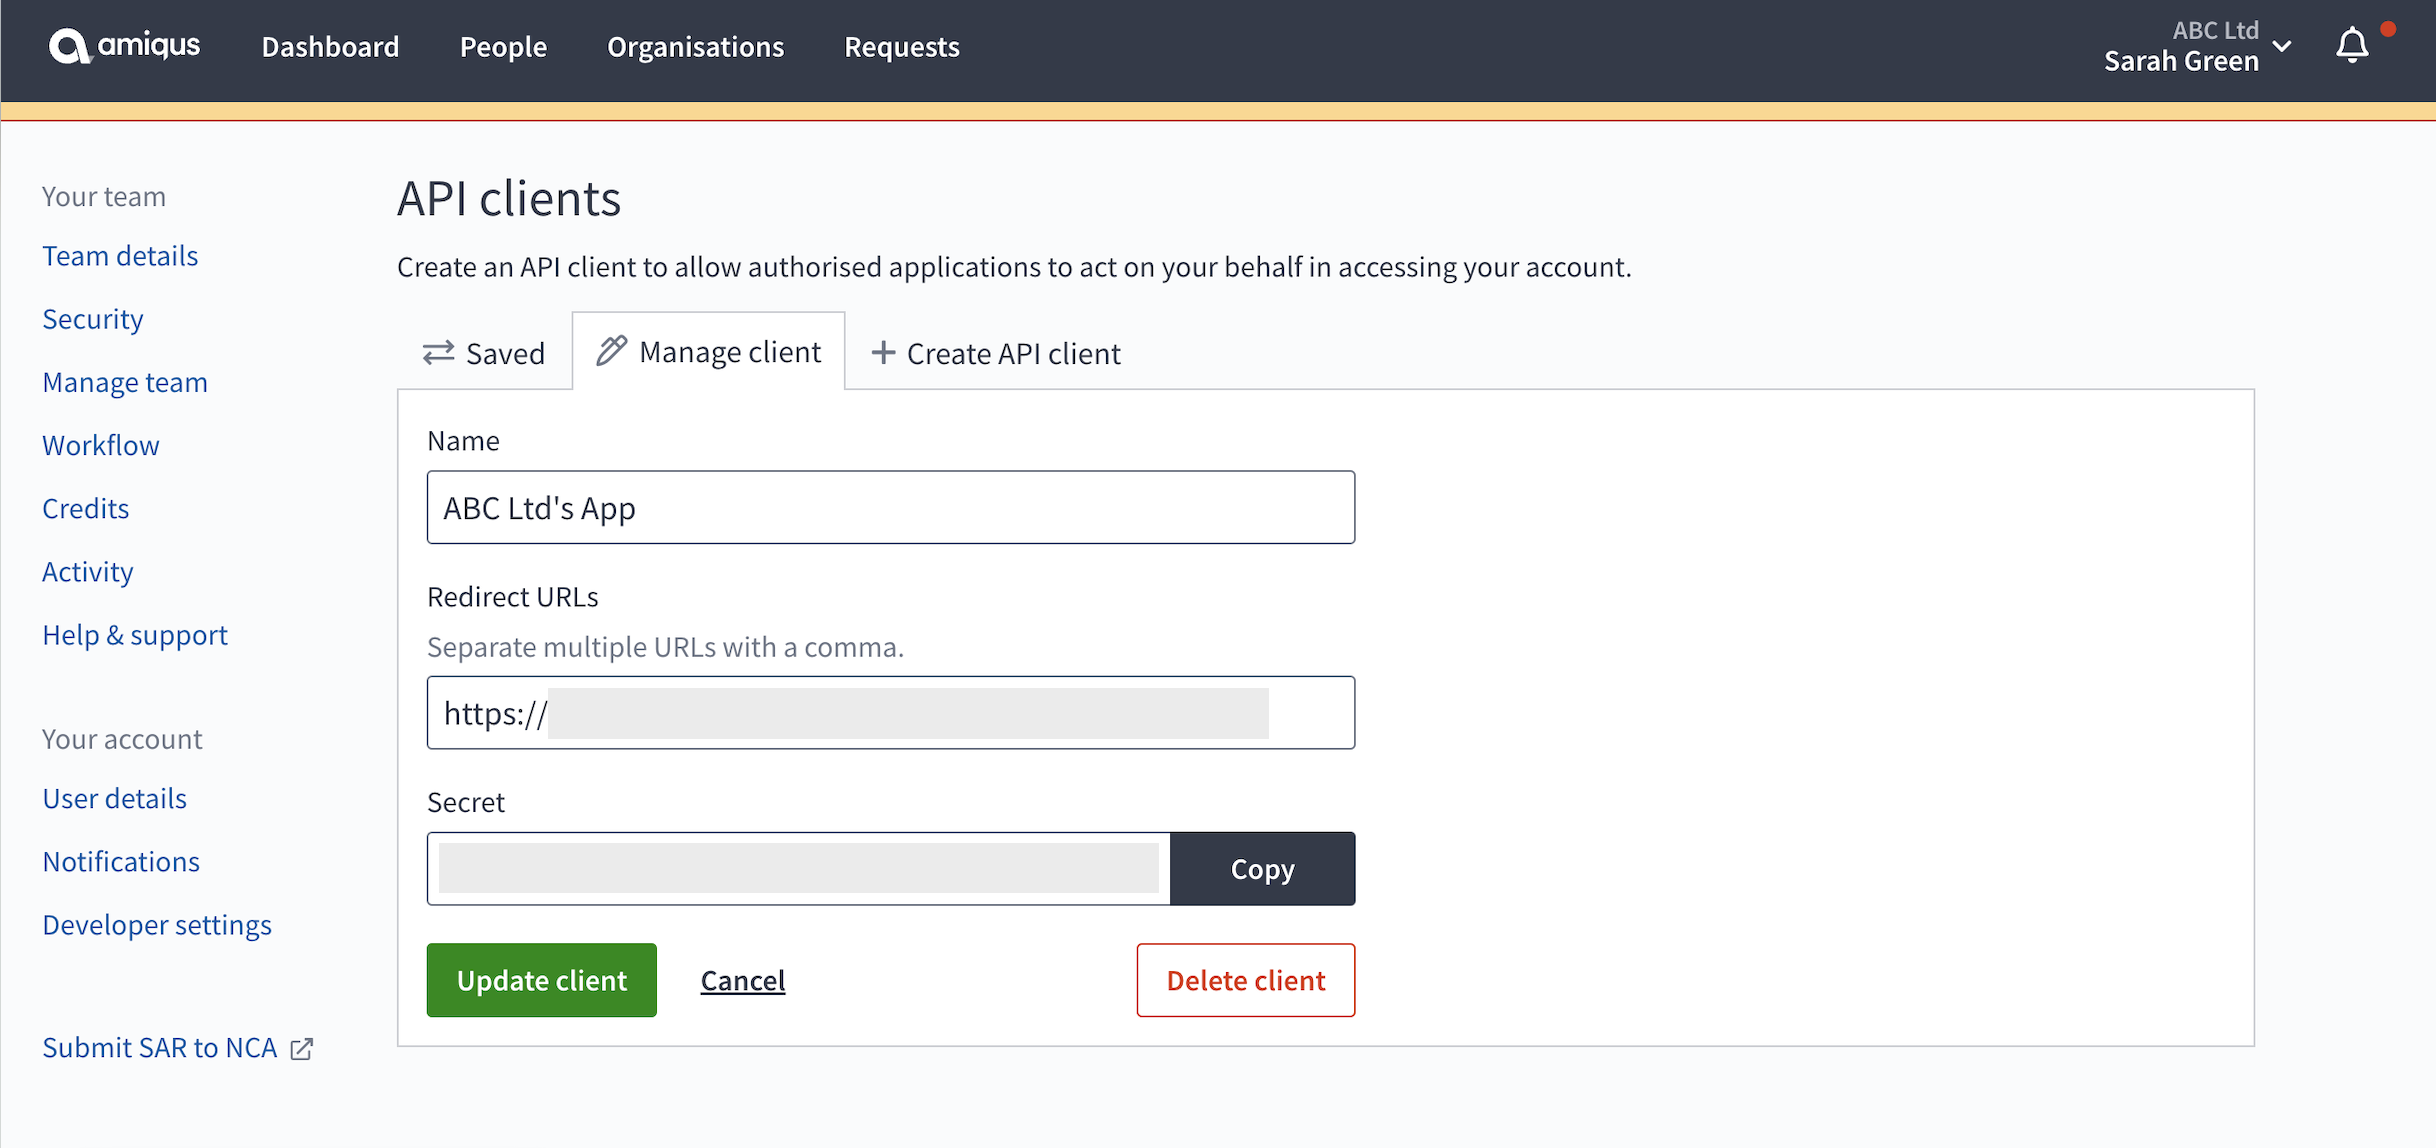
- The Client secret can be viewed by clicking on your API client in the overview. Here you can also make any updates to or delete your registration.
Authorisation
The OAuth 2.0 flow is comprised of the following steps:
- The user is redirected from your app to Amiqus;
- The user grants your app access to their Amiqus account;
- The user is redirected back to your app with an authorisation code;
- Your app makes a request to the Amiqus API exchanging the authorisation code for an access token;
- Your app can now use the access token to perform requests to the Amiqus API.
This flow should be unobstructive to the user's experience.
User authorisation
Direct the user to the authorisation page using the GET request outlined below. They will be asked to first log in if they are not already.
bash
https://id.amiqus.co/oauth/authorize?client_id={client_id}&redirect_uri={redirect_uri}&response_type=code&state={state}| Query string parameter | Required | Description |
|---|---|---|
client_id | Yes | Your API Client ID issued when your app was registered. |
redirect_uri | Yes | This is the URL of your app or service that users are redirected to after they have granted (or denied) access to Amiqus. This must match the URL linked to the registered app. The URL must be url-encoded. |
response_type | Yes | For an authorisation codes, value must be code. |
state | No | A value generated by your application that is returned along with the authorisation code to ensure the integrity of the request. This can be random or include metadata (e.g. base64 encoded JSON), but must not contain sensitive information. |
Once the user has granted or denied authorisation, they are redirected to the URL provided in the request, along with the query string parameter code and, if provided state. If authorisation is denied, the query string parameter error=access_denied is returned instead of code. In this event, you will need to re-start the authorisation process.
⚠️ Authorisation Code Lifetime
Authorisation codes are valid for 10 minutes and can only be redeemed once.
Requesting an access token
Now that you have an authorisation code, it can be exchanged for an access token. To do this, make a POST request to https://id.amiqus.co/oauth/token with the following payload:
| Parameter | Value |
|---|---|
grant_type | authorization_code |
client_id | Your API Client ID issued when your app was registered. |
client_secret | Your API Client secret issued when your application was registered. |
code | The authorisation code generated from the authorisation step. |
redirect_uri | The redirect URL registered with your API Client. |
Example
bash
curl -X POST \
  https://id.amiqus.co/oauth/token \
  -H 'Content-Type: application/x-www-form-urlencoded' \
  -d 'grant_type=authorization_code&client_id={client_id}&client_secret={client_secret}&code={authorisation_code}&redirect_uri={redirect_uri}'
bash
HTTP/1.1 200 OK
Content-Type: application/json
{
    "token_type": "Bearer",
    "expires_in": 31536000,
    "access_token": "eyJ0eXAiOiJ...",
    "refresh_token": "def5020..."
}
If your OAuth token request is successful you will recieve an access token in the response. The response will also contain the lifespan of the access token (in seconds) and a refresh token that can be used to generate a new access token without repeating the authorisation process (see Refreshing an access token).
💡
Remember to store both the access_token and refresh_token values safely as these are essential for your use of the Amiqus API.
Refreshing an access token
Now that you have an access token you can use the refresh token also provided in the response at any point to refresh your access token before it expires. By refreshing your access tokens, you can programmatically prevent them from expiring, without the need to repeat the authorisation flow. Each refresh token can only be used once.
To refresh your access token, you should make a POST request to https://id.amiqus.co/oauth/token and included the following payload:
| Parameter | Value |
|---|---|
grant_type | refresh_token. |
client_id | Your API Client ID issued when your app was registered. |
client_secret | Your API Client secret issued when your application was registered. |
refresh_token | The refresh token provided in the Requesting a token response. |
redirect_uri | The redirect URL your registered with your API client. |
Example
bash
curl -X POST \
  https://id.amiqus.co/oauth/token \
  -H 'Content-Type: application/x-www-form-urlencoded' \
  -d 'grant_type=refresh_token&client_id={client_id}&client_secret={client_secret}&code={authorisation_code}&redirect_uri={redirect_uri}'
bash
HTTP/1.1 200 OK
Content-Type: application/json
{
    "token_type": "Bearer",
    "expires_in": 31536000,
    "access_token": "eyJ0eXAiOiJ...",
    "refresh_token": "def5020..."
}
The response will be the same as when you requested an access token with the authorisation code.
⚠️ Access token replacement
The refresh token and the original access token are invalidated immediately after a successful response.
Using the token
Now that you have an access token you can start using the Amiqus API.
bash
curl https://id.amiqus.co/api/v2/me \
     --header 'Authorization: Bearer {access_token}'
bash
HTTP/1.1 200 OK
Content-Type: application/json
X-RateLimit-Limit: 200
X-RateLimit-Remaining: 199
{
    "object": "user",
    "id": 345789,
    "name": "Bob Gale",
    "email": "bob@example.com",
    "is_verified": true,
    "is_disabled": false,
    "created_at": "2019-08-24T14:15:22Z",
    "updated_at": "2019-08-24T14:15:22Z"
}
Revoking a token
Users may revoke access at any time by visiting the Team apps page in Workflow Integrations. If this is the case, you must put the user through the authorisation flow again to request a new access token.